


In today’s world, where technology is evolving faster than ever, Web application development is becoming increasingly popular. React is one of the most popular frameworks for building web applications. Because of its flexibility, scalability, and high performance. Once you’ve built your React app, the next step is to host it so that it can be accessed by your users. In this blog post, I’ll guide you through the easiest process of hosting a React app in Azure.
I am going to host a basic React application for this. Before we dive into the details of hosting a React app in Azure, it’s important to ensure that you have the necessary prerequisites.
Prerequisites
Firstly, you will need to have Node.js and npm installed on your local machine. If you don’t have these tools installed, you can download them from the official Node.js website. And also, you will need an Azure account. If you don’t already have an Azure account, you can get one by signing up on the Azure website. (https://azure.microsoft.com/en-us/). Once you have these prerequisites in place, You’ll be ready to proceed with hosting your React app in Azure.
Create and Build React App
As the first step, you need to create a React app. Open a terminal or command prompt and navigate to the directory where you want to create your project. Then, run the following command:
npx create-react-app my-appThis will create a new React project called “my-app” in the current directory. After creating a new React project. Navigate to the project directory by running the following command:
cd my-app
npm start
This will start the development server and open your React app in a web browser at **http://localhost:3000**. Then you can see the initial view of your react app like this.

You can make changes to your app and see the changes in real-time. This post is about hosting a React application. I am not going to change anything in the React app. You can make any changes to this application.
Once you’re happy with your React app. you can build it for production by running the following command:
npm run buildThis will create a build folder containing all the necessary files for deployment. Now that you have created and built your React app, you’re ready to move on to hosting it in Azure.
Deploy React app In Azure App Service
The next step is to sign in to your Azure account. If you don’t already have an Azure account, you can get one by signing up on the Azure website. After that, activate the free tier by following the instructions. Once you signed in, you will be able to see the Azure dashboard like this.
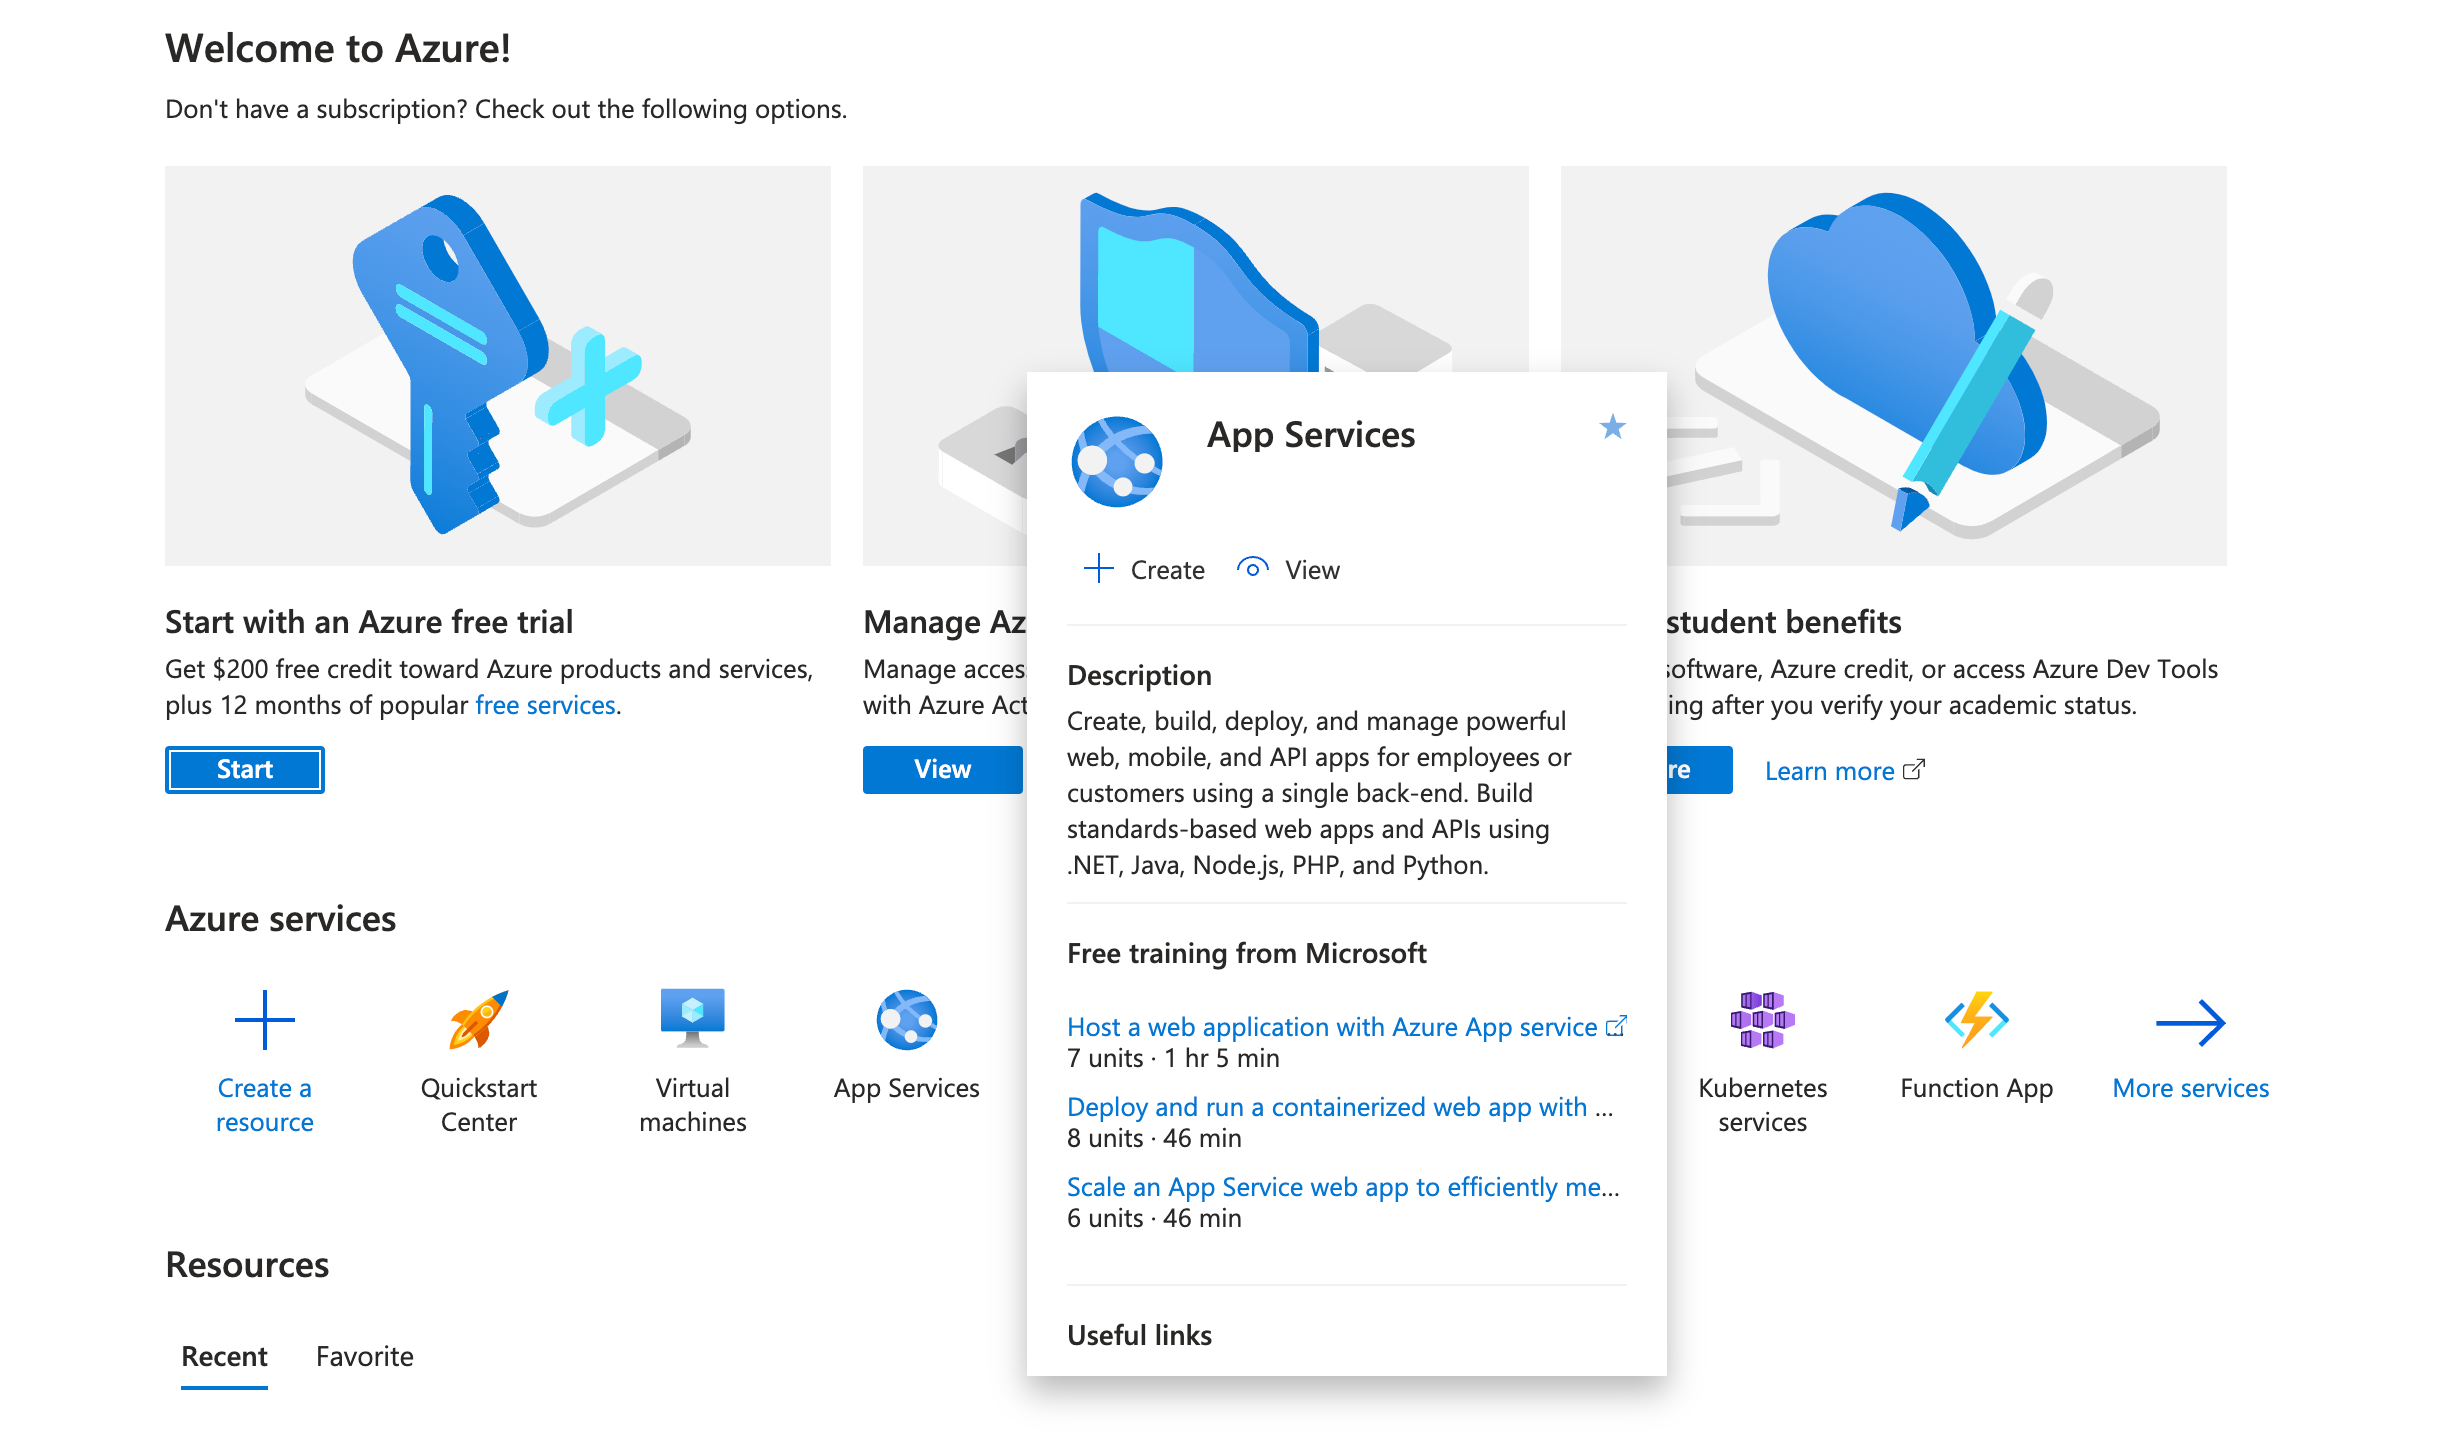
On the Azure dashboard, click on the App Service and then click on Create. Then you will be able to see the following form for creating the web app. In this form
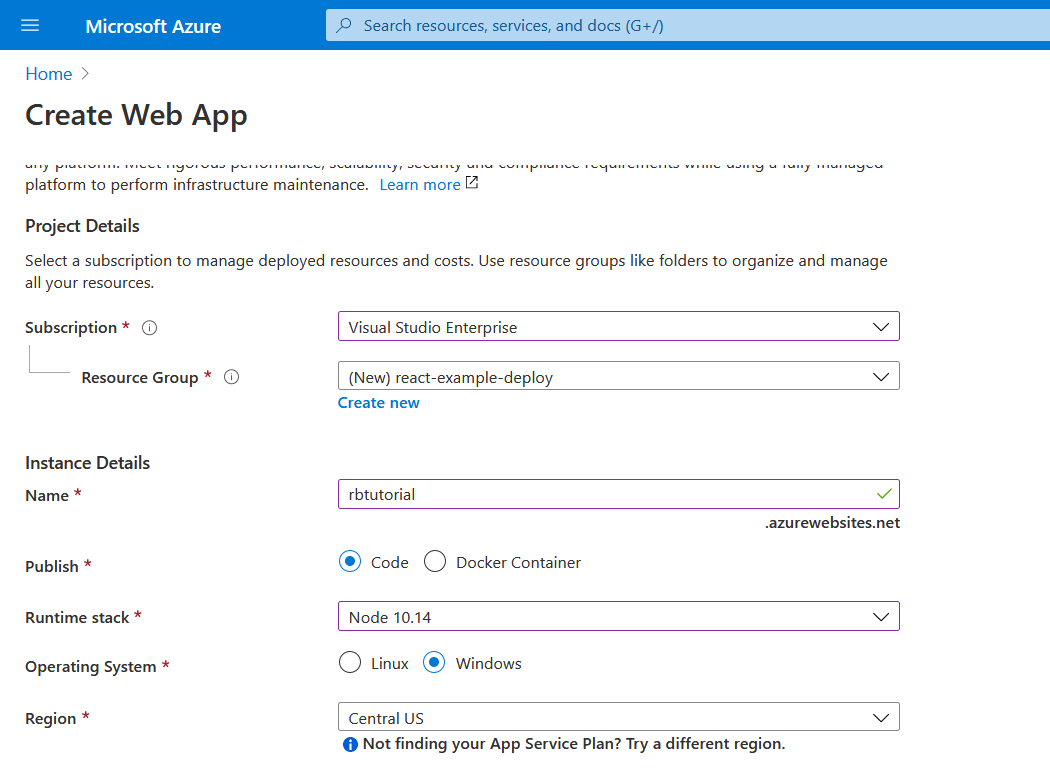
Fill out the above form following the following instructions.
- Subscription — If you are run with a free tier plan, select your free subscription.
- Resource Group — Create a new Resource Group for this app and select that resource group for this field.
- Name — Add the name for this app service. After deployment, you have to use this name in the link to access this service. the link is in this type {yourAppServiceName}.azurewebsites.net
- Publish — Select the code radio button for this because we are going to host our application as a code.
- Runtime Stack — Select the node environment in the dropdown list.
- Operating System — Choose the operating system as Windows.
- Region — Select the closest region to you or leave it at default.
- App Service Plan — Leave App Service Plan as default. You can also select the resources according to your requirements and service specifications.
Then click on “Review + Create”, and when your review is complete, click on “Create.”

After clicking on “Create”, it takes a few minutes to complete the deployment. After that, you will able to see a view like this with the message “Your deployment is complete”.
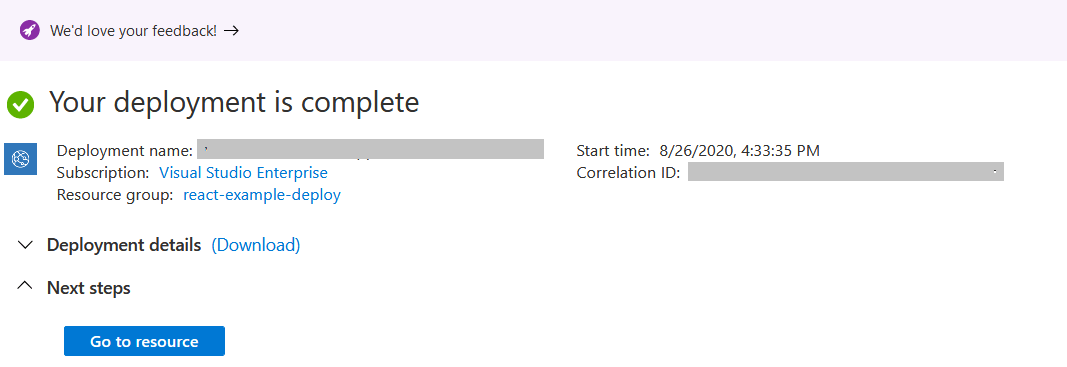
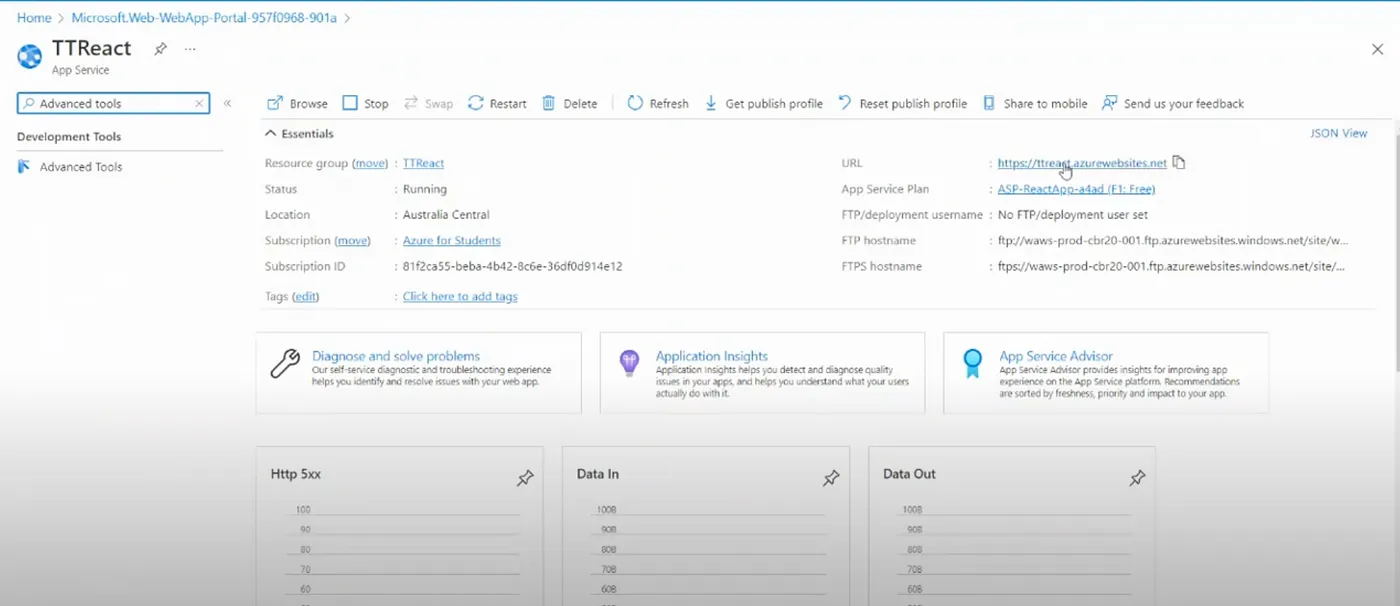
Then go to the resource by clicking “Go to Resource”. Clicking go to resource will redirect you to the following window.
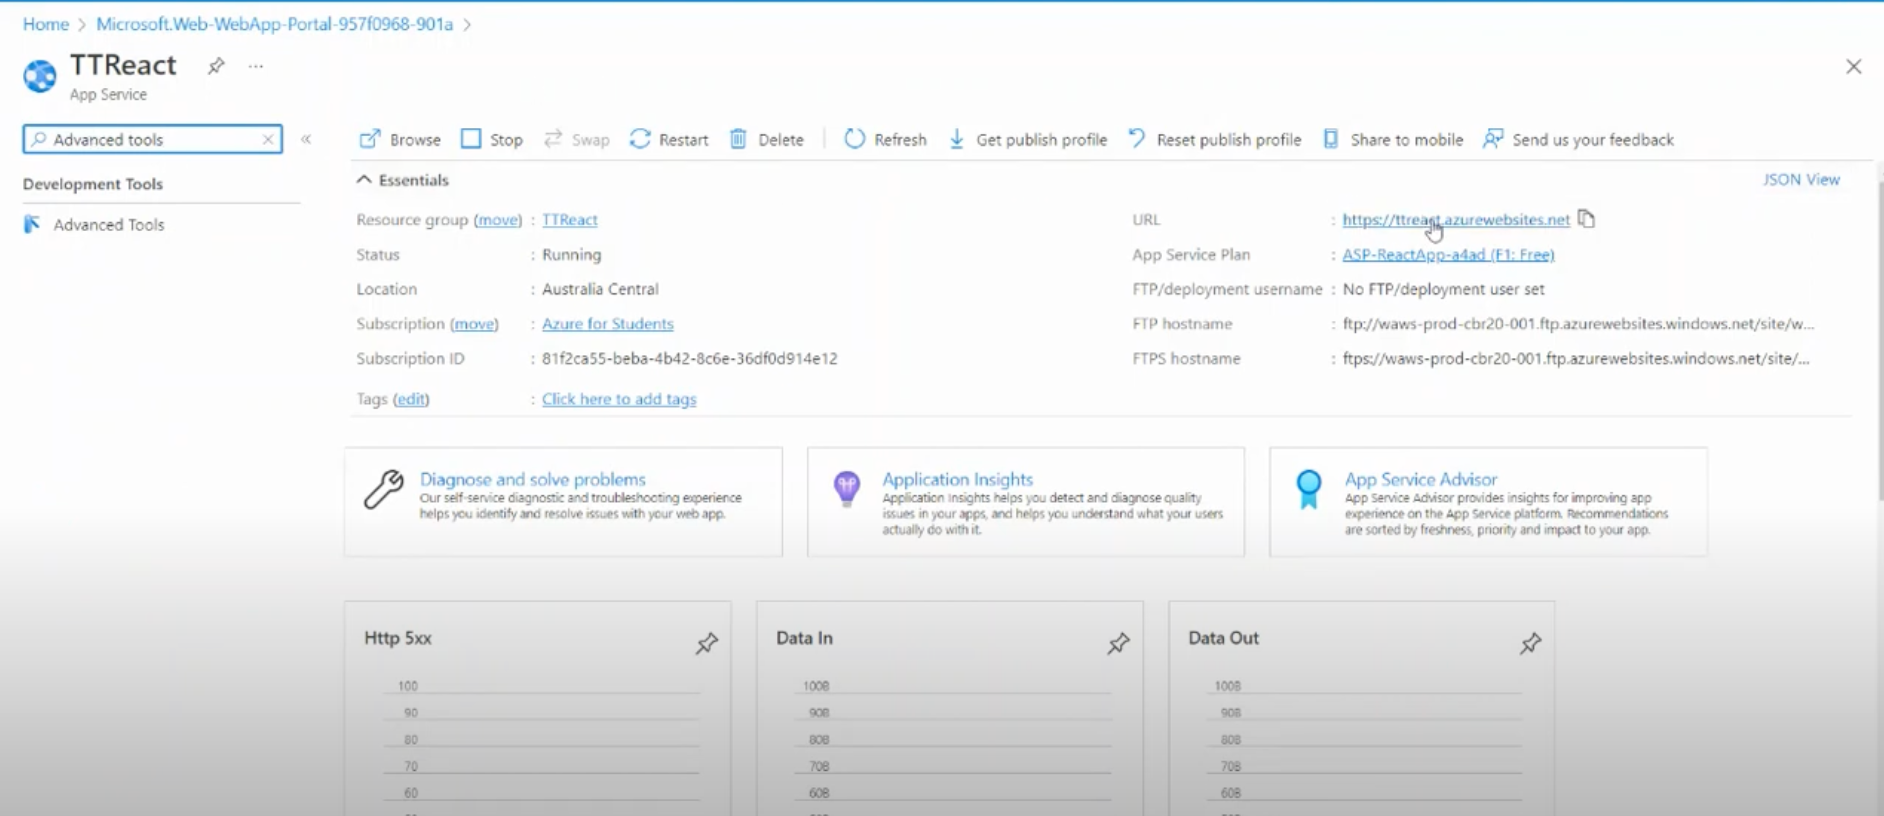
By opening the URL in a new tab, you will able to see a view like the following. Until now, we have not hosted our web application. It shows the initial view of the App service.

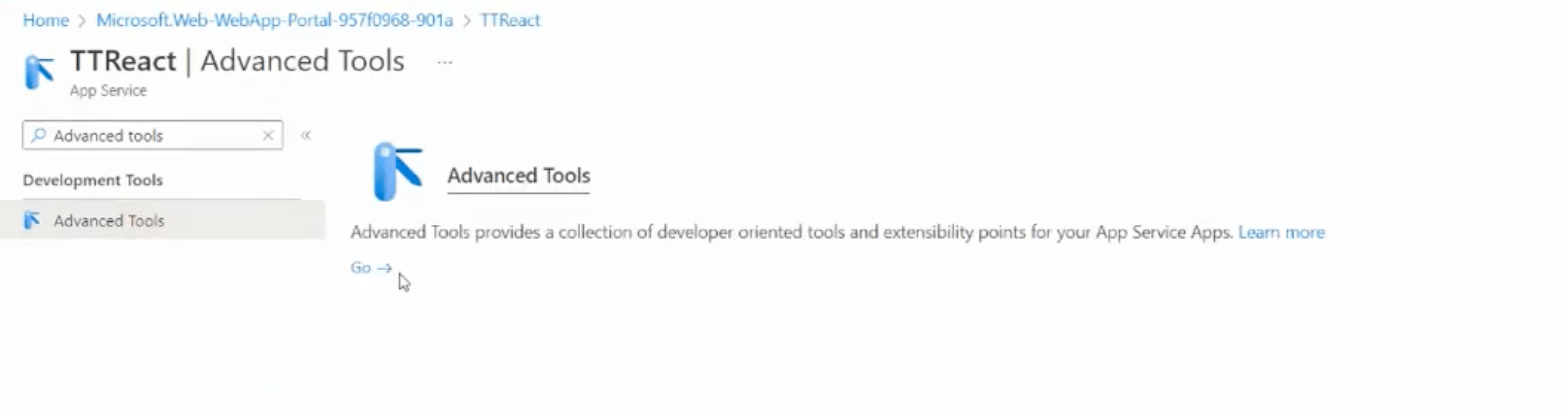
Let’s move to upload our react app for this service. For that first, we need to go to the “Advance Tools” of the created app service. for that search on the side menu search bar as “Advanced Tools” and click on that. Then you can see a view like following and click on “Go”.
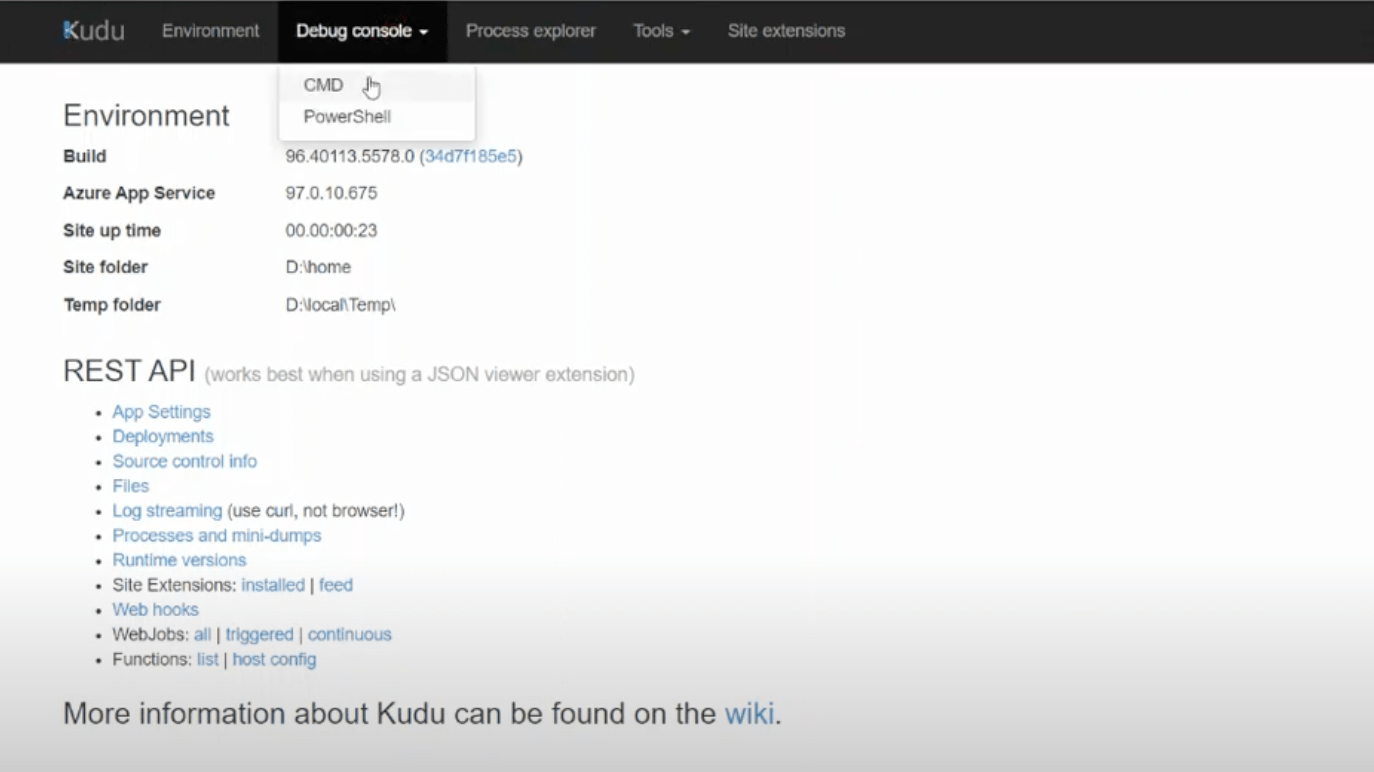
As the next step, you can see this window after that, go to “CMD” in the navigation bar under Debug console.
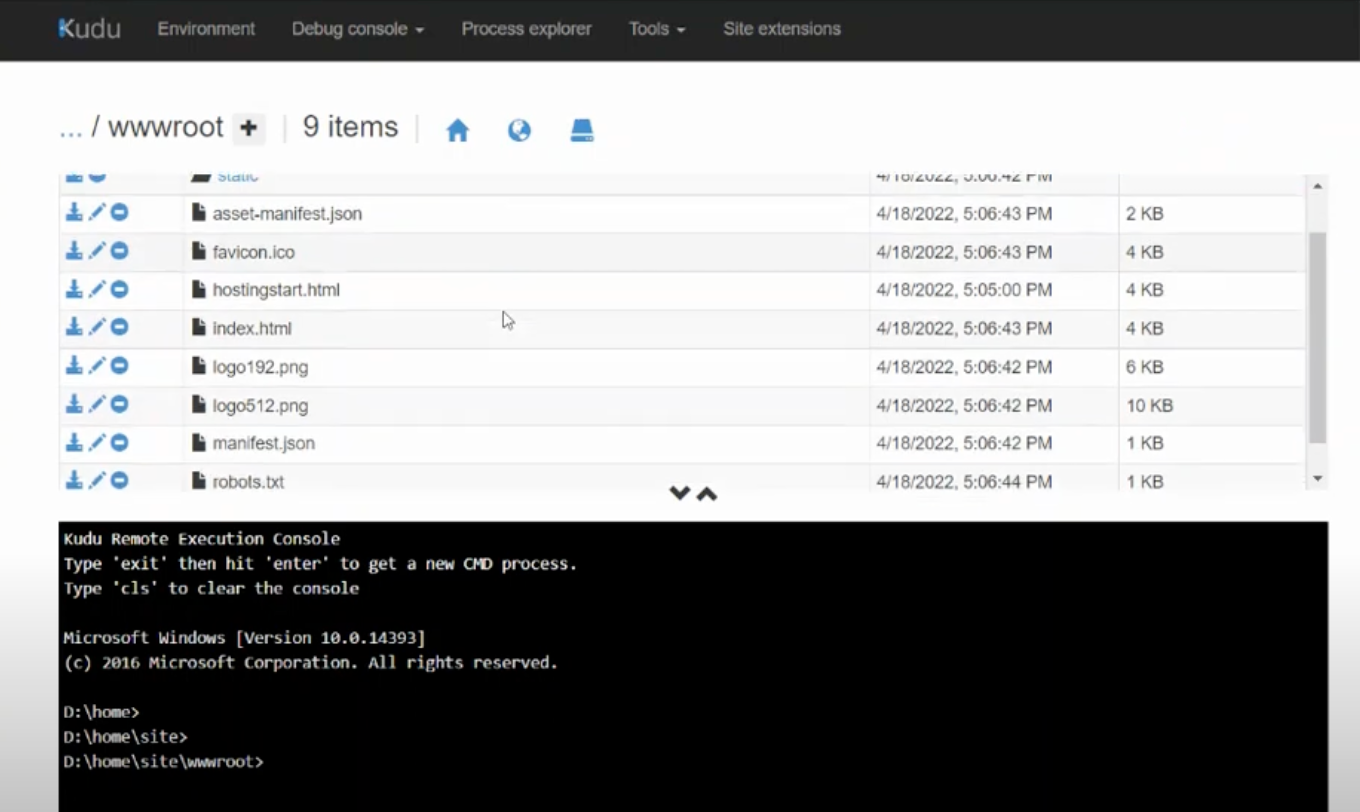
Then you can see a view like this. After that, go to the directory “site” and then go to the “wwwroot” folder.
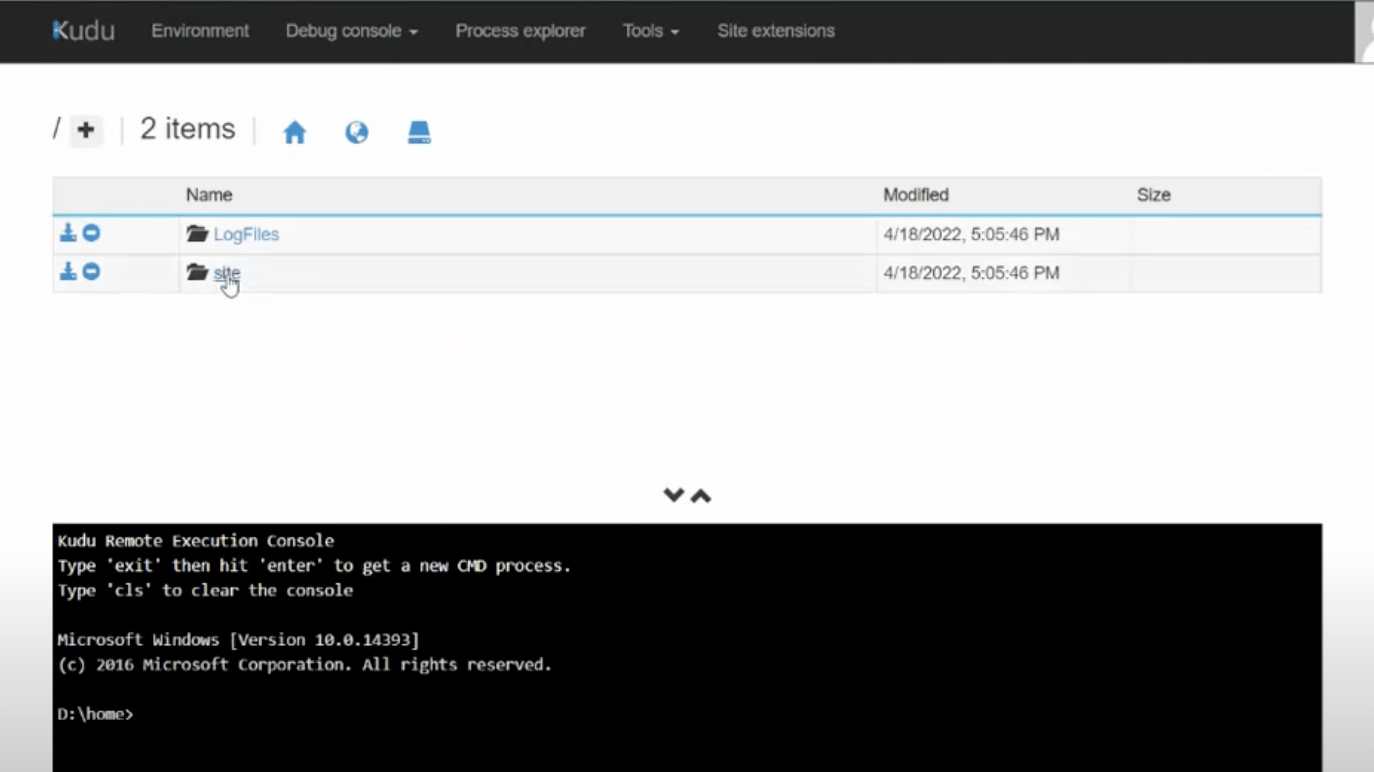
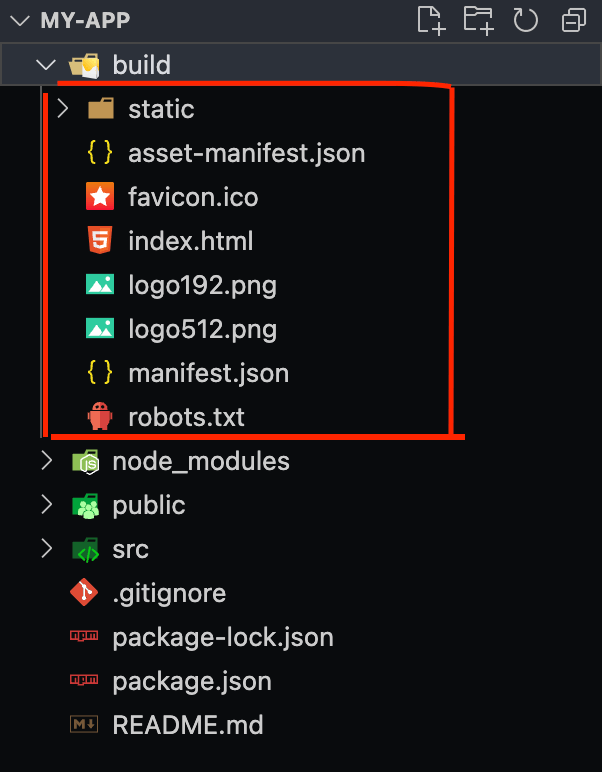
Then you have to directly upload the files inside the build folder of your React application to the “wwwroot” folder. It will take some time to upload.
After uploading the files inside the build folder, go to the URL on your resource page. You will able to see the deployed react application. The link is in this type {yourAppServiceName}.azurewebsites.net
Conclusion
Azure provides an easy and efficient way to host your React applications. By following this step, you can easily deploy your React application in Microsoft Azure. Also, you can host your static website by following this blog post.
This post originally published on https://medium.com/enlear-academy/how-to-deploy-react-app-on-azure-dbf36111cd54 in Enlear Academy Publication on Mar 30, 2023