

Step-by-Step Guide: Deploying a Node.js REST API on Azure Cloud
Are you looking to deploy your Node.js API in Azure? Azure app service is a powerful platform for hosting your web application in Microsoft Azure cloud. You may speed up the process of delivering your Node.js Express application to Microsft Azure by combining it with GitHub for version control and continuous deployment. We will walk you through the steps to achieve this seamless deployment procedure in this article.
Prerequisites
Before you begin, make sure you have the following in place:
- Node.js Installed: Ensure that you have Node.js and npm(node package manager) installed on your local development machine. You can download and install Node.js from official website: Node.js Download
- GitHub Account: You need a GitHub account to host your application source code.
- Azure Account: Sign up for an Azure account if you don’t already have one. You can get started with a free account, which includes a limited amount of resources.
Step 1: Create a Simple Node.js Express API
Let’s start by creating a simple Node.js Express API. If you already have an API, you can skip this step. Otherwise, follow these instructions:
- Create a new directory for your API project.
- Open your terminal in the project directory and run the following commands to initialize your project and install Express:
mkdir my-express-api
cd my-express-api
npm init -y
npm install express --save
3. Create a JavaScript file (e.g., app.js ) and set up a basic Express server. Here’s a simple example in JavaScript:
const express = require('express');
const app = express();
const port = process.env.PORT || 3000;

app.get('/', (req, res) => {
 res.send('Hello, World!');
});

app.listen(port, () => {
 console.log(`Server is running on port ${port}`);
});
3. Update the package.json with the following script.
"scripts": {
 "start":"node app.js"
},
4. Test your API locally by running npm start. You should see “Server is running on port 3000” in the console.
5. Also test your API locally, you can use the curl command-line tool. Open a new terminal window and run the following curl command to make a GET request to your API:
curl http://localhost:3000
This command sends a GET request to your locally running Express API. You should receive the response “Hello, World!” from your API.
Testing your API locally with curl allows you to ensure that it’s functioning correctly before deploying it to the Azure app service. With these additional instructions, you can verify that your locally hosted Express API responds as expected using the curl command-line tool.
Step 2: Create a GitHub Repository
If you haven’t already, create a GitHub repository to host your Node.js Express API’s source code. Follow these steps:
- Sign in to GitHub.
- Click the “+” sign in the upper right corner.
- Select “New repository.”
- Follow the instructions to create a new repository.
Step 3: Push Your Code to GitHub
With your GitHub repository set up, it’s time to push your Node.js Express API’s code to it. Open your terminal and navigate to your project’s root directory. Use these commands to initialize your Git repository, add your files, and push to GitHub:
git init
git add .
git commit -m "Initial commit"
git branch -M main
git remote add origin <your-github-repo-url>
git push -u origin main
Replace <your-github-repo-url> with the URL of your GitHub repository.
Step 4: Set Up an Azure App Services
Now, let’s create an Azure App service to host your Node.js Express API:
- Sign in to the Azure portal (https://portal.azure.com).
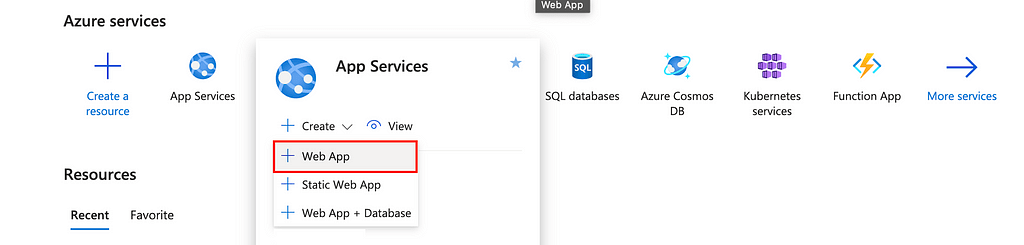
- Search App services on the Azure portal click on Create and select Web App from the dropdown as follows.
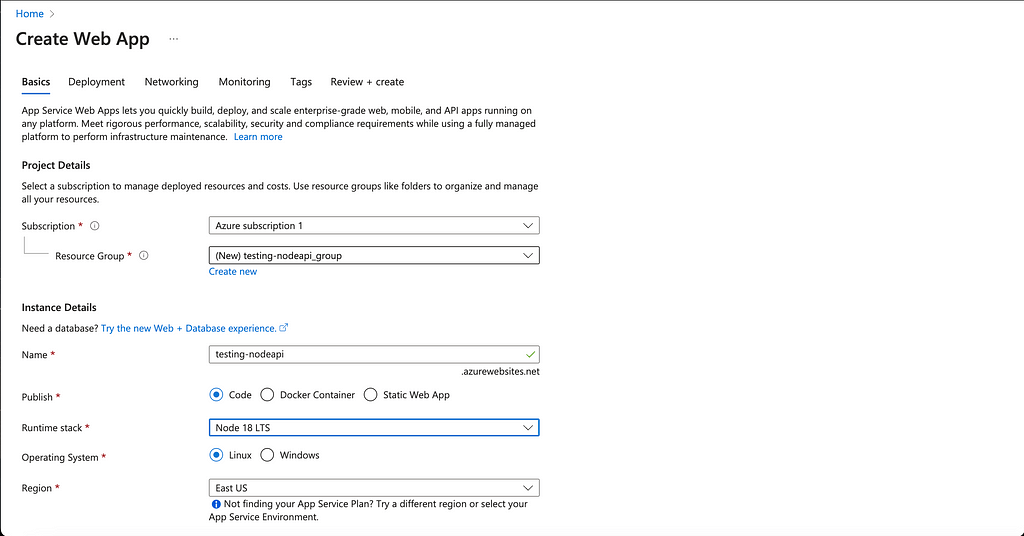
3. Create a new Web App, providing a unique name, subscription, resource group, and other necessary details as follows. Select the Runtime stack as Node 18 LTS.
4. Then, choose the pricing plan that is best for you. Because this is for educational purposes, I’ve chosen a free-price plan. You can find a suitable pricing plan by clicking on theExplore pricing plans
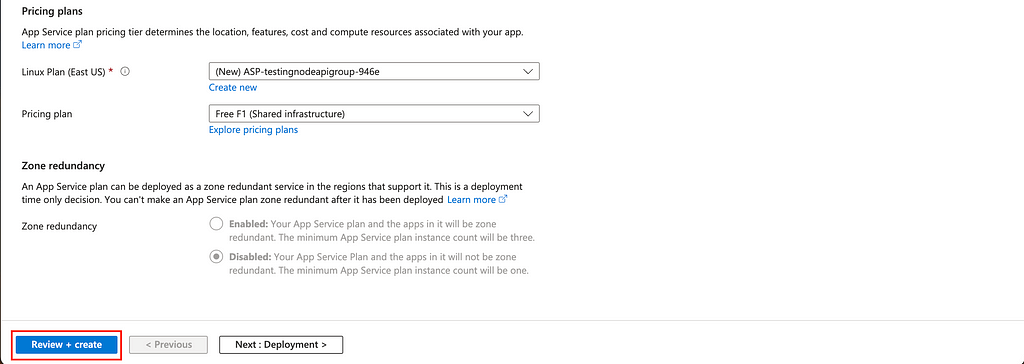
5. When you finish these steps, click the Review + Create button, and the web app with the name you entered will be created. The web app will take some time to complete the deployment.
6. After the deployment is complete, navigate to your Web app service by clicking on the service name you specified.
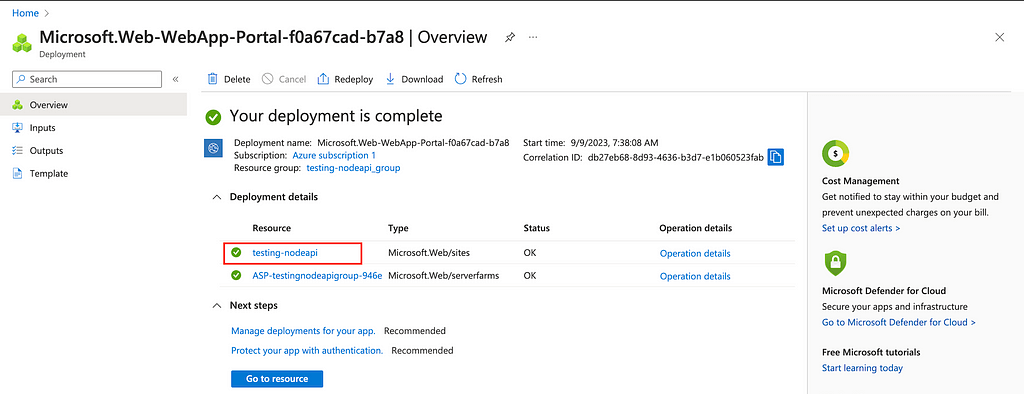
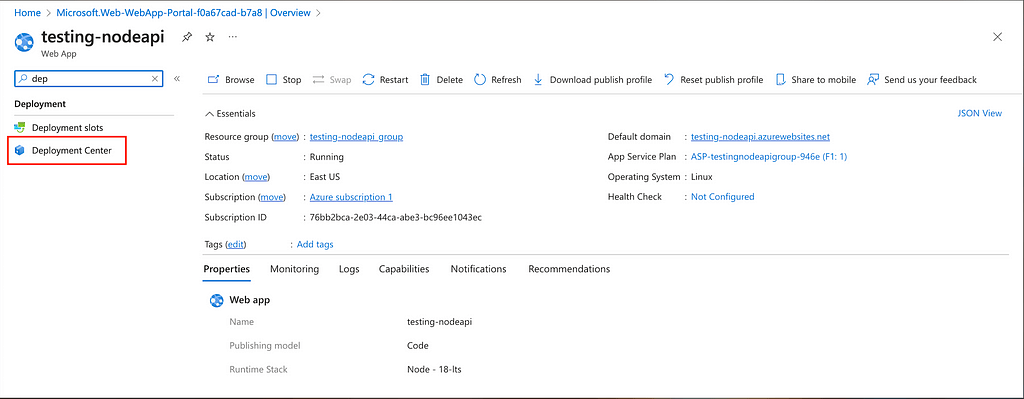
7. After that you will able to the the Web App service overview page for your project. Next Search Deployment Center From the sidebar click on that to configure the Azure continuous deployments.
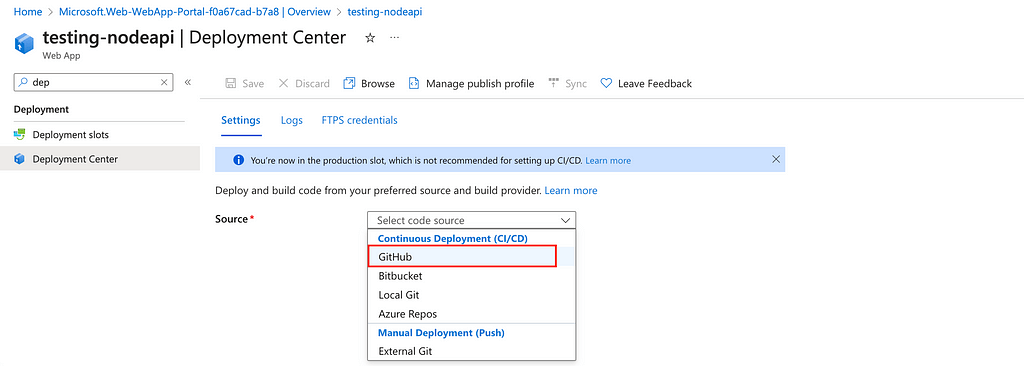
Step 5: Configure Azure Deployment Center
- On that go to Settings tab and select the Source as GitHub as follows.
2. After that you have to link your GitHub account with your Azure account by following the necessary steps.
3. Next, you’ll need to choose the repository where your Node Express API source code is hosted and specify the branch for setting up the CI/CD pipeline as follows.
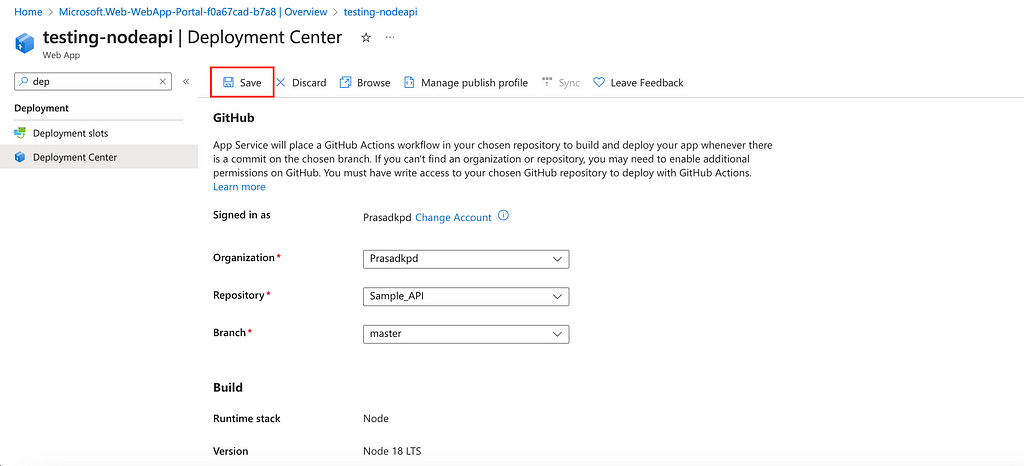
4. When all the steps are done click on the save button. This will create a GitHub action on your repository. And deploy your Node.js app on Azure Web app services.
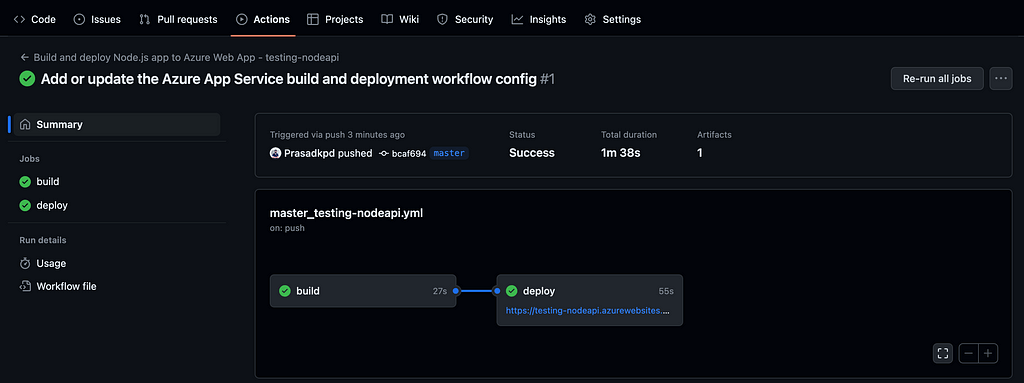
5. Azure will automatically trigger a deployment whenever you push changes to the specified branch (master) in your GitHub repository.
Step 6: Complete the Configuration
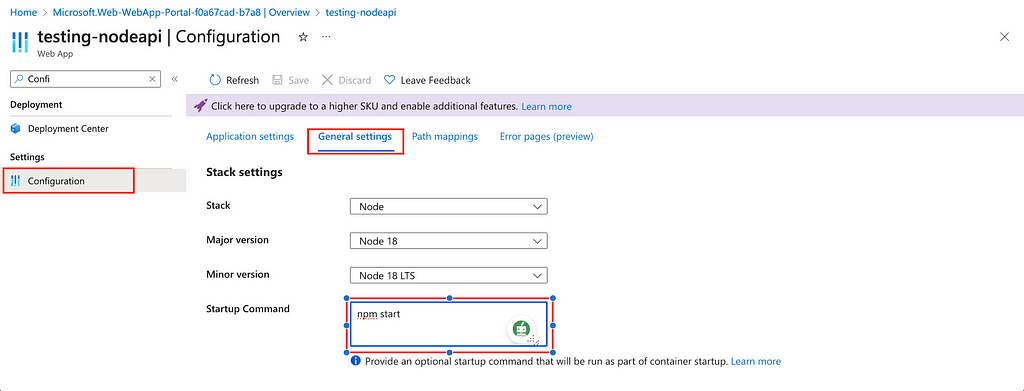
When the deployment is finished, Search Configuration from the sidebar and click on that to configure the startup command.
Then go to the general Settings tab and enter the Startup command to start our Node.js application. After that click on the Save button. This will start the Node.js application.
Step 7: Access Your API
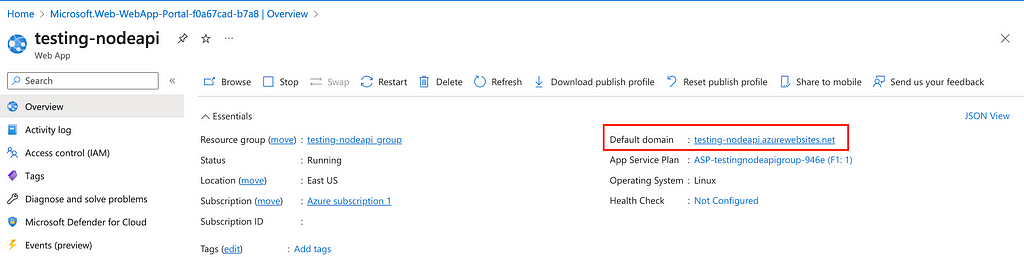
After a successful deployment, your Node.js Express API should be accessible through the Azure Web App’s URL. You can find this URL in the Azure portal’s overview page for your Web App.
You can test your Node app by using the curl command in your terminal.

Step 8: Configure Custom Domains (Optional)
If you have a custom domain for your API, you can configure it to point to your Azure Web App. This step involves updating your DNS settings in your domain registrar’s control panel.
Conclusion
Congratulations! You have successfully deployed your Node Express API in Azure App Service with GitHub. Using GitHub for version control and continuous deployment to deploy a simple Node.js Express API to Azure Web App streamlines the deployment process, making it easy to manage and update your API. You can efficiently host and maintain your API on the cloud if you follow these procedures.
Remember to treat any Azure environment-specific configurations (e.g., database connection strings) correctly. With this setup in place, you can concentrate on designing your API while Azure handles the deployment.
Resources
Example Node API Code Repository –https://github.com/Prasadkpd/Sample_API
How to deploy a Node Express API on Azure Web App with GitHub was originally published in Enlear Academy on Medium, where people are continuing the conversation by highlighting and responding to this story.